Showing posts with label Tutorial:Beauty Related. Show all posts

Thursday, November 26, 2009

Happy Thanksgiving and New Tutorial for you guys!

First off, Happy Thanksgiving everyone! I will be eating turkey legs and mashed potatoes. You guys?

Anyway, I was just thinking about making a small makeup case for myself (I will do a tutorial on that as well, like months later) so if I ever do a sleepover or a small weekend trip with my friends, I'll have a nice carrying case for myself instead of doing the ziplock baggie method. But, I have depotted all of my shadows, becuase I don't have that much space in my room or my mini traincase. Most shadow packaging is like GINORMOUS. It's like yes, thanks company for using 2x as much plastic that is actually necessary. So, I depot. Same with lipsticks. I like to put darker lipsticks in small pots. It reduces the space necessary to store them by like literally, 300%. Yeah yeah, you need a lip brush but you know what? Give some take some.


Like I was saying. I use a discarded CD case as my palettes and they're kinda heavy and large. Too large to just shove in a small bag right? So I decided to make a tutorial on how to make a travel-size one. Pictures then tutorial:


It's meant to hold 4 DS sized eyeshadows comfortably. Approximately. So, 4 Revlon Matte shadows, 3 covergirl + 1 almay etcetcetc. But, if you NEED more, then (i've tried) you can fit up to 3 Revlon matte eyeshadows (side by side no space in between) and 2 HIP duos. So you always have enough!


Instructions:


1. See the template and cut out pieces accordingly. I used thick cardboard so it's sturdy.


2. Now, I will be dealing with all the pieces except the TOP okay? Okay! Cut out all the pieces, and really make sure that they fit well together. This is especially important because then they'll have a seamless fit. Wrap them in nicer paper so it's not ugly.

3. Take the base and cover it with sheets of magnets. You can use those cheap magnets that they give away at libraries, etcetcetc. Or you can go to a craft store and buy a magnetic sheet. It's important that it's a SHEET not those little circle-y things so that it lays as flat as possible.


4. Now, use a hotglue gun and glue all the sides (except the top!) together.


5. Now, measure again to make sure that the top fits perfectly. Wallpaper. Glue a button for the handle on the top. Also, take a small mirror that is sorta flattish and glue it on the other side. I used a mirror that I ripped off the HIP duo packaging.
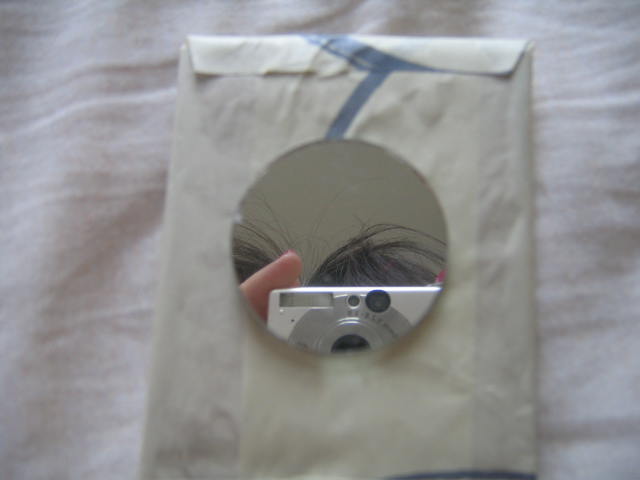


6. Put it lightly on top of the actual box thing. Leave a little gap. Take a piece of duct tape and tape the top to the box. Open the box and repeat so that the gap is all covered by tape.


7. Okay! Almost done. Take another piece of tape and tape a piece of string to the lid as so:


8. Voila! Done! It fits in the palm of my hand at least.
Toodles<3

Tuesday, August 18, 2009

We're making a Traincase...! Part 2

Note to new readers: part one is the post before.

Now that we have our actual traincase up, it's time to decorate. First, you want to put something that will keep the thing shut. I used an old belt and I hot glued it on.


For decorations, I used small beads and I made rosettes. I'll show you how to make them!

1. Cut out a approx. 4 in by .75 in of fabric. It doesn't have to be nice, it can be very messy.


2. Now, place a dab of hot glue on the very outermost edge of where you want that rosette to be. Twist an end of the fabric and stick it on. Keep twisting and gluing until you have a circle. You don't have to twist it to death. It looks better if it's a bit loose.


3. Keep twisting and gluing in circles so that it fills up the middle space. It can puff up a bit, but that's fine. Once you fill it up all the way to the center, then snip off any excess fabric.


4. see that little bit just sticking out? Put some hot glue in the center of the rosette and twist the end and stick it in it's place. Final result?


My final traincase box?


Toodles<3

Monday, August 17, 2009

We're making a..... TRAINCASE! part one.

Okay, so we are making a psuedo-traincase thing. I call this a pseudo traincase because it doesn't have a handle. Instead, it's more of a drawer to carry your makeup so when you travel, you have it all organized in a small box! I will be posting this in 2 parts because if I make this one post, it'll be really really long. OH, and i don't have pictures for the beginning few steps because my pictures were all deleted when my computer crashed! I took new ones though!

Instructions:
1. Get a shoebox. Then take the lid, and you know how theres the long part of the lid? Well, snip it so it's not connected to the short sides of the lid. This will make your "hinge" to connect to the actual BOX. Now, tape that long side that you snipped to the box.

2. Now, what do you want to do? Do you want to make another layer? I did. So, take a smaller box that fits in the shoebox, and measure how high you want to be elevated. Then, take cardboard and cut out rectangles to fit into the box so that the bottom layer will be divided and the smaller box will be supported. Now, you have 2 layers! Oh, and you should take this time to reinforce the box with more cardboard.

3. Okay, now what you want to do is to cover the box with fabric. You can use paper, or whatever you want. There is no real way to glue it, so you can just wrap it. It doesn't have to be perfect because we will be hiding flaws later. Also, don't wrap fabric on the inside because we'll be layering it with other stuff. It takes some creative thinking. to cover the whole box with one piece of fabric.
4. Now cut out cardboard pieces that fit into the sides, bottom, top of the lid, and sides of the lid. These don't need to be thick pieces. They can be just thin posterboard. Cover this with another fabric. These don't need to be covered on both sides. Any divisions that you do need to be covered on both sides. Also, cover the smaller box that you put in.


5. Before we glue these suckers in, think, do you want ribbon? trimmings? This is the time to put on any ribbon and such. To make the things that keep the lid from just flopping back, cut the ribbon in half, and glue them in, connecting the lid to the box at an angle. YOu can see this in the previous picture. And when you cut the ribbon in half, make sure to hem it so it doesn't fray. I used a satin ribbon.


6. Now, we can stick in our "inside"s. The stuff that we covered with fabric.


See how all the grossness is covered up? Now, we need to stick the separations in. Put glue on the bottom and then stick those babies in. Okay, now, you should glue the sides. see picture. THis will keep the pieces from falling.


7. FINALLY.


Tomorrow, I will be posting part 2.

Toodles<3

Sunday, June 28, 2009

FOTD Tutorial: Making Bangles

So approximately one month ago, I was at Macys in New York to look at the flower show. My family and I were looking for some jewelery and I found this really really cute bangle. I look at the price tag and wtf? 60$?! That's incredibly expensive. So, I devised a new way to make one that is similar and for less than 10$.

What you need:

  • 1 wooden like bangle/bracelet. I used a wooden letter O that you can find in craft stores like AC Moore. You can find wooden bangles for crafting online at websites such as http://www.artbeads.com/wooden-bangles.htmlbangles.html.
  • Some Yarn or embroidery thread. If you use embroidery thread, don't pull apart all the strands into tiny threads. I used some yarn.
  • Decorations. You can use anything! Mini Roses, beads, whatever. I used some beads found at AC Moore.
  • Hot glue gun. The glue stick things are like 10 cents a piece and you can get a small glue gun for 2.19 at AC Moores

Instructions

  • Put a bit of glue on the bottom of the bangle, stick the yarn on and start wrapping it around the bangle itself. Then if you want to, use some glue to glue the yarn to the bangle. This dries really really fast so only put glue on a small section, glue the yarn and keep wrapping. This is what it should look like.
  • When you're done wrapping, put glue on the inner part of the bangle and secure the end piece of the yarn there.
  • Now, add your decorations. Use the hot glue gun to do that. Then, you are finished! Pictures below
Toodles<3>

Thursday, June 18, 2009

FOTD: Purple


I gotta say, I'm pretty impressd with myself this week. I've been posting a whole lot these days. I'm not sure why.... Maybe it's because I have a lot of time so do so, so I keep posting.
Well, today, I also had math finals. Very depressing. It's also raining a lot outside. It's supposed rain for 5 days straight. OMFG. WHY?!?!?!?!??!?!??!?!??!?!?!?!?!?!? Why can't it be sunny?! Well, I hoep that it stops sooner or later. It's getting so gross outside.
So, I decided to post my eyelook of the day using the new Kitschmas pigment that I got. Meh, I'm not a huge fan of it at all. I don't think that I would get this as a full sized jar.
Here, I used, NYX jumbo pencil in Yogurt, Frosted Lilac shadow by NYX, Revlon Matte shadow in Rich Sable, HIP cream eyeliner, Plum Reflection by Black Radiance
EDITTTTTT------------------------------------------------------------------>
I cannot get this layout thingie straight. I want to have 2 columns of stuff. One on each side of the post things. Anyone care to tell me how to do that?
Toodles <3

Wednesday, June 17, 2009

Swap mini haul/NYX depot journey

Hello lovely ladies. Today, I decided to switch my font from Arial to Trebuchet. That was random, but I decided to say so anyway.
So, I recieved my swap items from awsumchick07. She is the best swapper ever because of fast shipping and great extras. I got a bare minerals glimmer eyeshadow in envy, MAC pigment sample in Kitschmas (funny name isn't it), Chanel lotion sample, and a Bond Girl 09 perfume sample.

so, anyone see something wrong in the picture with the bareminerals glimmer eyeshadows? Hmm? Because I do. Isn't there supposed to be a sifter there? Well there is. Isn't a sifter's job to make is less messy and keep all the eyeshadow from just plopping out? Well, look at that. There is a sifter in the jar, I checked. But, all the eyeshadow is on top of it. That defeates the whole point of a sifter! I'm not going to dump the eyeshadow out, take out the sifter and put the eyeshadow back in because this stuff isn't cheap. I believe that its what, 13$ at Sephora? I can't go out, buy 10 of these, and still have money. So, I'll just deal with that. I love both of these colors. Kitschmas is a nice lilac color, very frosty and light. INNER CORNER and highlight! Envy is also very frosty, but I think that it's okay to put that as an all over color.. as long as you tone it down with a matte color. I should do eye looks on these. I need to get a blending brush. If you want to swap with me, Pnkxsparklexstar on makeupalley!
Used wet, these eyeshadows are great! Used over a base, still great! Not used on a base, Kitschmas gives a lot of fallout. Chanel lotion was used up today. The smell is very very strong. It's not a bad smell, but not that pleasent either. I really liked how moisturizing it is. Perfume will be used later. I still have another perfume sample that I still need to use. Ugh, whatever. It is FUKC brand perfume from a different swap.

I HATE DEPOTTING NYX JUMBO PENCILS. I love those things. They are cheap, come in many different colors, but seriously? It took me forever to depot into a new jar. So, let's begin.


If you can see, the lid on this jumbo pencil is like cracked and gone. It's gross. I used up the lotion, so now, I have a new jar to depot into! Yay! Also, i don't have a sharpener, and I don't want to get one. Depotting is cheaper, and (I thought at the time) cheaper. So, obviously, you melt this thing with heat

It's now 7:30, I decided to do my old trick: use my old trusty incandescent lamp that produces a lot of heat to melt. I use this for melting lipsticks, depotting eyeshadow, etcetcetc. So, why not use this to depot Jumbo sticks

8:00 PM-- STILL NOT coming out. Now, I'm pissed off. I take out my flat iron, set it to high, waited one minute, and held it around the pencil. I thought, well, maybe it's becuase everything inside needs to be melted right? Not working. I turn the thing off, and decide to go to plan 2.

I rip off the top metal part, which is a huge ordeal in itself. Wow, that's hard to take off. I used pliers and made a mess.


8:30-- now, I've tried heating this thing AGAIN. NOT WORKING. I decided to now step downstairs and shove this in the microwave. And guess what? It melts in like 5 minutes. WTF?!?!?!?!??! Maybe it needs a higher temperature? It needs to be heated all the way through? I considered using a blowdryer, but that is so noisy. I hate blowdryers in general because of the noise level. I don't like to use a microwave because I feel like I get a lot of lost product. Oh well. Does anyone else have this issue? Or is it just me? o.0

Toodles <3

Tuesday, June 16, 2009

FOTD Tutorial: Aqua Eyes

I'm currently on a tightened budget. I am only allowing myself to spend money on swapping, which is actually more economical if you think about it. I won't (or will try not to) buy any more makeup or stuff and save my money for a new digital camera (mine sucks atm because it just doesn't photograph details too well), curling/flat irons, brushes.


So, you can see that my camera isn't too good with details. You can't see the inner corner color, and no, my skin isnt that pale. I had to play with the lighting a bit because if I do flash, it washes everything out. You can kind of get an idea of what this look looks like, but ugh.

I like this look for the beach, party, whatever. I don't think that it's school appropriate, but it's fine for the mall. I also used low cost products so if you are just starting in makeup, this is for you! Actually, it's for everyone so just scratch out that last line.


1. Use a base. I used Lumene eyeprimer base. I depotted it into a BE foundation container thing that I swapped for. It is currently discontinued in the USA, but I think that you can get this in other European countries.


2. Apply Revlon Matte Eyeshadow in Venetian Blue all over the lid. Gently, because this is a very pigmented color. I'm using this as a light base for the next couple colors. The brush that I'm using is Essence of Beauty eyeshadow brush. It's nice and large and fluffyish. Good quality.


3. Use the Spirited HIP duo. It is a metallic(?) duo. It has a nice light blue and a dark blue with shimmer. Take the light blue and put it in the inner 1/3 of the eye, the part nearer to the nose. Then bring it above the Venetian blue just a little bit, stopping in the middle of the eye. Then, using the other side of the brush, use the dark side and brush it in the outer 1/3 of the eye. Bring that up lightly into the crease. If you don't have a crease, like me, then make a v shaped thing. I am using the EoB concealer brush, large one.


4. Then, take a pencil like brush (I'm using a crease brush, again by EoB) and use a gold eyeshadow and put it in your inner corner. Blend it into the Spirited eyeshadow in the upper lid and bring it into the lower eyelid. I'm using Gilded, another HIP metallic duo.


5. Now, take the same brush as before, dip it into the Venetian blue and brush it into the lower eyelid. Really try to pack it on, because you want this to be bright and vibrant. Then take the dark side of the Spirited eyeshadow duo and put it on the outer corner, connecting it with the same colored shadow you applied earlier on the top lid.


6. Use a blue liquid liner on the top and bottom lid. I used Mark by AVON chrome liner in chrome blue. Be careful with this because it takes some time to dry.

7. Highlight with the second color in the Kerry's Bronzes palette by L'Oreal. I'm using the EoB eyeshadow brush.
8. Use an eyeliner brush and take a black eyeliner to line your waterline. I'm using the L'Oreal HIP cream color truth eyeliner. This is great but expensive for a drugstore product. You can use Jane's gel liners instead.
9. Curl/use mascara blahblahblah.

And voila! You're done! That was easy. The cost of everything:

Brushes by EoB: 9.99$ for a mini set with everything that i've used.

Chrome Liquid eyeliner: 5.50$

HIP cream eyeliner: 12-14$

HIP duos: 7-8$

Revlon matte blue: 5$

Mascara: 7-9$

Base:10$

Total: 68$ This seems like a lot, but with this money, you can only get 3 MAC pigments, 4 Sephora brand brushes, 2-3 foundations at Clinique, or maybe just 2 eyeshadows from Dior. It's not too much to spend on a lot of products. Also, I got some of these for BOGOF, and swapping. So this decreases the price significantly especially if you pay a smaller amount for shipping!

Toodles<3


Saturday, June 13, 2009

HIP shadow sticks revisited

Just a quick update on this shadow stick

So, after ranting about how I hated this thing in a different posting, I decided to give this one more shot and crush this thing. Now, it works. Let me explain

First, I crushed this thing. It's not easy to crush you know. It has this almost filmyness on the outside of it so it's not easy to get it into a fine powder. And even when you crush it, it's not very fine or powdery. I used a bottom of a concealer stick. Then, when you use your eyeshadow brush to use it, swatch it on your hand first. Notice how there's kinda eyeshadow-y granules. You need to crush these with your brush. I mean, really work your brush and the product into your hand. Then, you'll realize that there is actually product to be used!

I'm still not going to buy this again. WTF? You need to take so much time to just... use this thing. Which, sucks btw. It gives a blue based silver.

Toodles <3

Friday, May 15, 2009

Pressing Physicians Formula Baked Trios

Hello all! Today, is another day for a tutorial! So, if you read my blog, you will know that I hate the Baked Formula trios because of the stupid rounded top things. I understand the need to be creative, but what is wrong with the plain flat eyeshadow? Domed eyeshadows are bad because they don't pick up on your brush well.

And on a side note. For all those melting eyeshadows in a plastic old eyeshadow thing, only melt a tiny little bit at a time. If you don't the plastic might warp. The estee Lauder palette was made of more sturdy plastic, so it didn't. A Revlon matte shadow or a NYX one could warp and it might be bad.... so yeah. Just a tip.
Anyway, lets get started.

Things needed:
A dual ended pointy thing such as a kebob stick, knitting needle etc. A small jar, eyeshadow tins, 70% or 90% alcohol, cotton balls, paper underneath to protect your workspace from mess, a thing to press your eyeshadow, a fabric piece.

Instructions:
1. Crush up your eyeshadow
Use one end of your knitting needle thing to break up the eyeshadow into your jar/mixing place. The slower you do this, the finer the eyeshadow dust will be. You should do this so that the eyshadow is very fine. This will eliminate the need to crush it. And it will absorb the alcohol better.
2. Add alcohol
Only less than a capful is needed. Don't add so much that it become like a liquid sea, but add enough until it is the consistancy of oatmeal.
3. Spoon everything into a little eyeshadow pan
Don't worry about overspill. Alcohol makes the eyeshadow look more... volumious. I guess. Like it takes up more space. You should fill it up to the top. One maybelline duo eyeshadow tin will be able to hold all of one color. If you still have some stuff left in the cup, gently take a piece of fabric and gently put it over the wet eyeshadow in the tin and soak up some alcohol. Spoon the rest into the tin.

4. Press your shadow
After soaking up the excess alcohol, take something that is around the size of the pan and press! Don't press until your arm falls off. If you do, then you'll probably push all the eyeshadow out. Just press until its firmly in the pan. Choose a fabric with a good pattern if you want it to have some pattern on your shadow. I used a concealer stick to press.


5. Let it dry
It takes around 1 day to dry.
Toodles <3


Wednesday, April 29, 2009

Tutorial: Making a sample lip pallette

So, today is a new day. Time for a new font color and font thingie! So, before I make my packaged delivery (new swapping), I decided to make a tutorial on a sample lip pallette. You can use this when sending an extra, for travel, if you're super OCD and like to order things, I dont know. Its good for that. XD
What you need:

  • A plastic knife. I used a stupid spoon b/c I didn't have one.
  • An empty shadow or quad or duo or whatever plastic thing. You know those MAC empty black containers you back to MAC for? I'm not talking about the pan thing. You'll see what I mean. I'm using an sample sized Estee Lauder quad.
  • Lipsticks of choice (I used Romantic Red, Airy Fairy, Mango Tango, and Violet Shine)
  • Rubbing alcohol to sanitize
  • Something to melt the lipsticks. I used my incandesent lamp. You can melt the lipsticks before hand in a little tin thing over the stove and pour it in. Whatever gets the job done.

Instructions

  • It goes without saying. SANITIZE. OR ELSE. Do you know how much bacteria is on this? Gross.
  • I already did three pan things. So, cut a little bit of the lipstick. I'm doing Romantic Red by Ulta. Put the slice in the empty eyeshadow pot place.
  • <-- See how there is no eyeshadow tin thing? It's just the plastic.
  • Melt it down. I held it under a lightbulb. If you do that, make sure to really keep it steady. All the other lipsticks will also melt down and you want a nice flat surface right? Okay! Moving forward. If you don't have enough to cover the plastic bottom, just slice off some more slivers and pop that in there.
  • Cool. If theres nasty residue on the sides (like I do), just wipe that off with a q-tip. The end result is on the right.
Yes, I know that the picture isn't right side up, but I'm not going to change it. Isn't it cute? I love it.

Words of Wisdom
  • Do yourself a favor, and don't use those eyeshadow things with the hole in the bottom. Examples are Milani or Revlon Matte. When you go to depot the shadow metal tin, you can find a hole (sometimes) on the bottom hidden usually by a label. DON'T USE THESE. I've learned the hard way.... Don't even ask.

<3>