Thursday, December 29, 2011

DIY: Fur Vest and Belt

I've been obsessed with fur vests lately. However, nice ones are hard to come by. I wanted to make a belt and vest ensemble, but the belt came up too wide, especially since the vest is a short vest. I originally wanted a thinner, leather belt, but they didn't have fake leather in stock and that made me unhappy :'(


What you'll need:
1. Faux Fur- I got 3/4 of a yard from Mood in NY. That place is the best. 
2. Closures- I got a zipper that wasn't separating >.> Go me
3. Lining- The underside of faux fur is rough, kinda like carpet. I went for a cheap polyester one
4. Belt Material - I went with an elastic because they didn't have pleather. 
5. Closure for belt- I went with snaps (size 2) 
6. Belt Buckle


Everything was gotten from Mood


Step 1: Make yo design/pattern. 
A vest is literally a rectangle with holes for arms. You want to measure across your shoulder, your arm hole+ 1 inch or so so you don't feel restricted, and the front should be half of shoulder+ 2 inches. That's because you have a width and you are 3D. Add more if you need more width. 


Step 2: Draw out your pattern on faux fur. 
You want to basically draw out the rectangle. Don't worry about length, worry about width. When cutting faux fur, lay it so that the fur is on the table. If you use scissors, you want to slide the tip so that it only cuts the backing. Don't just go crazy and chop it with large snips. If you do, then it'll shed like crazy. If you try to cut only the backing, you'll have minimal shedding. It only sheds where you cut. Then it stops. You want to leave an inch for later. 


Step 3: Basting/Cut armholes
Normally I would attach the lining first, but this time I won't. Baste the shoulder seams. Then, cut a large slit for the armhole. Then, make a "v" for your neckline and baste that as well. 


After basting the shoulder seams and neckline
Step 4: Sew your heart out with a machine. 
This is the only time you will machine sew. Sew the shoulder seams. 


Step 5: Attaching the lining. 
You want to attach the lining with this method on the armholes, shoulder, back, neckline and bottom hem. I actually did the bottom hem second to last because I didn't cut the bottom until I did the shoulder seams. What you basically do is fold the faux fur over the lining, and stich using a ladder or whip stich (or both!)


Completed the armholes, neckline, back. You fold the fur back onto the lining and that's how you get a circular armhole. 


Step 6: Sewing the rest of the front. 
Hopefully you've left the part that would hold closures (zipper, fur hooks etc) unlined. Basically this time you want to fold the lining so that it lines up with the fur. I'm doing it this way because I don't want the fur to be rolled over. I want the closure to rest on the polyester. It'll be easier to sew that way. BTW, I fold the fur over the lining to make a more "soft" look. If you dont' want that, then use said method to attach the lining to the fur. 


Step 7: Cutting the Bottom and lining it
If you have not done so already, figure how how short you want the vest and cut cut cut! Make sure to leave a 1.5 inch hem to fold up onto the lining. 


Step 8: Attaching the Closure
'Nuff said. Attach the closure. 


Making the belt


Step 1: Hem the elastic
I folded over 2 inches of the elastic and used the elastic stitch on the sewing machine. 


Step 2: Attach snaps
ATTACH YO SNAPS. 


Freaking annoying. 


Step 3: Attach yo buckle
I did it by sewing it on. 


Finished garments
Poop. The belt is much too wide. Hopefully I can find material to make a new belt! If not, oh well. I still have a cute vest and a cute belt! Expect OOTD!

Monday, December 26, 2011

Holiday Mittens for my Sister

Tomorrow, I'm going to NY to shop! I'm hoping to go to the fashion district for some faux fur to make a vest. It's super cute! Until then, I made mittens for my sister


I'm planning on making a pair for myself. I'm also expecting rhinestones and glue to come in the mail so I'll have a few DIYs coming up this month! Happy holidays!

Wednesday, December 21, 2011

DIY: Leopard Print Skirt

This is a super quick and easy skirt. All you need is an old shirt and a zipper. 


 Cut along the straight line, and sew along the dotted lines. 


 Fold down the top to make a waistband. Also, leave room if you want a zipper! Take the time to repin and reshape it into the shape you want. 
 I FLASHED YOU BECAUSE I CAN. okay i have problems. 

Total time: 30 min. 
Total Cost: 0$

Saturday, December 17, 2011

Midnight Train to Macy's

Not really. I went there at like 10 am, but I am writing this post  at midnight. Sorry for the lack of posts, but I have had finals!


Blondie Tee- 4.99
Jeans by Dollhouse- 19.99

Saturday, December 10, 2011

Myrtle pump by Nomad

A million thanks to my sister who bought these shoes for me!


I got some early scuff marks on them, but luckily I was able to get them off with an eraser!

Monday, December 5, 2011

Review: Adore Me Lingerie

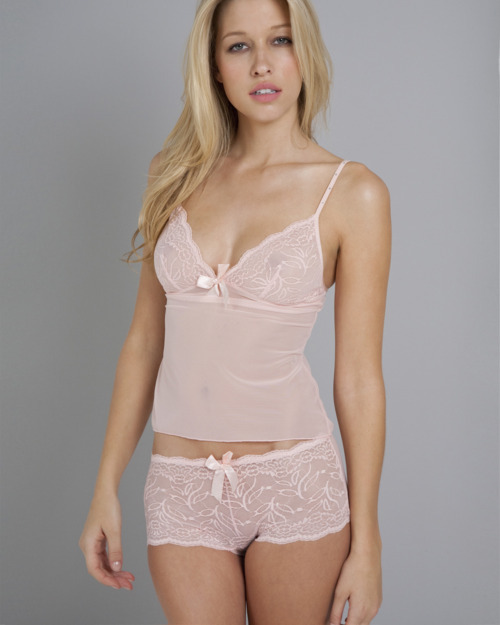
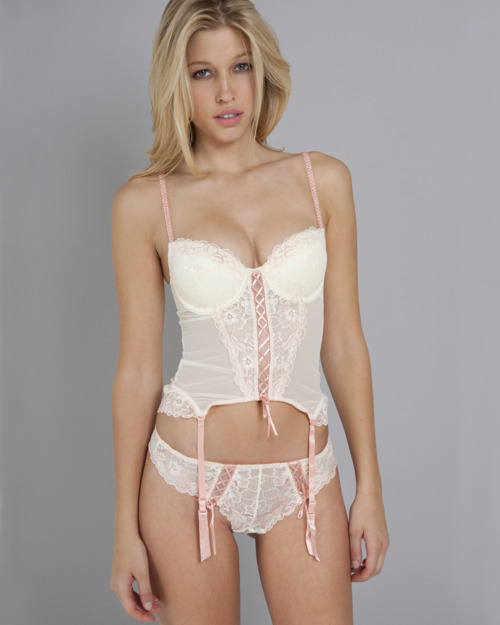
So recently I got a lingerie set from Adore Me to try out. Adore me is supposed to be the very first customizable lingerie store. It's basically like ShoeDazzle, but for lingerie. I did the whole shebang: signing up, getting lingerie picked for me, getting a free set. I'll be reviewing everything: from signing up to trying it on. 


Signing up: So signing up is pretty easy. You just need to input your email to actually sign up. Then you have to take this like 5 page quiz. Each page has 3 questions, so it's not that bad. The one thing I didn't like about the quiz was how it asked "which person do you identify your style with". It was like 3 random people who I didn't even know. Okay, I knew Dita Von Teese, but the other people I was like "...... uh.... her.. I think..?" That could definitely could be improved. 


Getting a Showroom: It takes 24 hours to get a showroom. I guess it takes time to build it? Anyway, I was slightly disappointed with what they came up with. I even took the quiz again to get a different one. In the quiz, they asked what kind of underwear I liked. I said the ones with the triangle butts. I like my butt to be covered. However, I got a whole ton of sets with thong underwear. Only 3 out of 10 had the triangle butt underwear. Terrible. Also we had to input our bra size and underwear size. I actually got sets that didn't contain my bra size. Maybe they were out of stock? Idk. Maybe they just don't have a large collection and thats why I keep getting thong undewear? IDK. But this really needs to be fixed. 


Packaging: I got my package and it was this plastic bag thing. Inside was one of those boxes you get for packing cakes. It's pretty thin and it got pretty crushed and I was sad. I think that the packaging could go either plastic bag or firm box, not both. I guess it saves money doing with the thinner box..? But that's my opinion. I mean, if i actually paid 40 dollars, I better get a box that's sturdy. I mean when you look at Glossybox or those other 10$ a month for a bunch of beauty stuff boxes, they're boxes are sturdy and not crushable. However, the pink tissue paper is cute. 


The bra is really cute. It's soft and whatnot. However, the underwear give me a huge wedgie whenever I walk around. Maybe I got the wrong size? I got a small, which is my default size. They don't tell you how large the "small" or "larges" are. I don't care if it's free returns because returns are a bitch and I don't like to deal with them. 


Shipping/Price: Shipping was pretty fast. However, the price isn't cute. It's basically 40 dollars. That's really expensive considering how I didn't like my sets in the showroom, the underwear is giving me a massive wedgie, and the cheap-ish packaging. Frankly, 40 dollars is 40 dollars to me. I get underwear at target for .75 clearance and bras at 3 dollars at Sears clearance. I feel like the quality should have made up for the expensive price, but for me, it didn't. The bra feels like my sears clearance bra and well, you know how I feel about the underwear. 


Recommended: Eh.. I had high hopes for this company. It's a fairly new company so it could really stand to make some changes. I would like it a lot better if they would separate it into bra/underwear. I don't like their underwear choices, but I do like their bras. It's expensive, which could really turn people off from trying out this brand. So overall, recommended for people who like thongs and who have 40 dollars. 


Edit (12/6/11 at 12:10 pm)- I have talked to a representative of the company. and she says that  the company is working on making changes to make shopping experience better. 

Sunday, December 4, 2011

Review: Milani Liquif'eye Metallic Eyeliner Pencil in 05 Brown

Hey! I hope that everyone's weekend has been great so far. Mine has been excellent (even though I have to study for an econ test today). So according to the previous post, I bought this bugger from CVS for a freaking 8.49. 


Let's get started. 


Their Claims and such: Extremely smooth eye pencil with the application and feel of a liquid liner
that delivers true color payoff, in a metallic finish with a long-lasting wear.

Swatch: I'm a lazy butt. It's in the previous post--> AKA HERE. This isn't metallic. I would imagine that the gold and silver colors are, but this really isn't. 

Longevity: It's okay. I know that theoretically, it's a dupe of UD 24/7 liner or the MUFE liner. OKAY EVERYTHING IS NOW A DUPE OF UD 24/7 LINER BUT THAT'S NOT THE POINT. 

The point is, it's good for my eyes. Just as a recap, I blink a ton and my eyes are watery. This combined with TFSI is pretty cool. It doesn't run as much. I still find that I am reapplying at the 8 hr mark, but that's okay. I also tried it on the upper eyelid (for you monolid people), and it's terrible even with TFSI. It like.. fades and stuff.. However, it doesn't travel up the eyelid. It doesn't make you look like you have extra eyeshadow on which is awesome and stuff. 

Packaging: Standard eyeliner packaging. Nothing too special. 

Price: Complete bullshit. It's actually 8.49 at CVS (last time I checked). It used to be at 6.49. Cool beans. Soon, drugstore items will actually be as expensive as MAC. 

Recommnded: Overall, yes. You can go to Target or Walmart to get this for much cheaper. I have some ECB so I will be getting this in Aqua. If you see it on sale, you should get it. Just saying. 

Saturday, November 26, 2011

Swatch: Milani Liquif'eye eyeliner.

CVS is terrible. They have ridiculous prices for everything. Luckily, I have a 10$ ECB thing so I bought a new eyeliner. Here is a swatch for now! Review coming up this week :)


So far, it's super creamy and pigmented. I can't wait to try this one out over the next week! I have another ECB so I might pick it up in Aqua. I heard it's a dupe for UD flipside and I kinda want UD flipside. 

Tuesday, November 22, 2011

DIY Sweater dress: Finally knitted and completed

I finally finished my sweaterdress. Any ideas on how to style it?


Thursday, November 17, 2011

Adore Me!

Hey darlings! I just wanted to take some time to do an introduction for this fairly new company:
They're like Shoe Dazzle, except for lingerie. Basically what you do is sign up for the service, and they put together a little showroom for you and you can choose to buy a set (bra+ underwear) for 39.95. They have free shipping and free exchanges, so you don't have to worry too much about getting the wrong size. 


So I've already signed up for the service: What you do first is basically take a quiz and then they make a showroom for you every month. It's pretty cool and I'm going to try this out soon so keep reading for more info! You can check them out here on fb as well! Click here to start shopping! 


Wednesday, November 16, 2011

OOTD: Black&Yellow

This isn't *really* a black and yellow look. It's more like neutral and yellow. 

Jacket- Forever 21 (32.50)
Tights- Forever 21 (5.00)
Top- Forever 21 (7.00)
Necklace- DIY 
Belt- Vintage from home. 
Pants- DIY shorts
Boots- Amazon.com (20.00)

Thursday, November 10, 2011

Review: Double Trouble Mascara by Lash Em

So around two weeks ago, I got a free tube of mascara from Lash Em. I really like this mascara! Here is my review below :)


Claims (as taken from the website here):

  • Define and smooth lashes for an even application without clumps. 
  • Flexible cotton fibers wrap around each lash like a tube to help thicken and curl lashes.
  • Build length for an instant lash extension effect.
  • Nourish and hydrate for longer, thicker, voluptuous lashes. 
  • Volume fiber enhance lash growth for a bolder look. 
  • Formula is easily removed, which is great to use on sensitive and fragile lashes. 

Here are some pictures loves!
Naked lashes

After the two sides

So this is what it looks like after the two sides. Frankly, it looks like I have longer lashes. I don't feel like I have "more" lashes at all. I like how my lashes are really defined. 
Brushes: 
Volumizing Brush

Lengthening Brush
I think that it's really strange that the plastic brush is the volumising brush and the bristle is the lengthening brush. I feel like it should be the other way around, agreed? I feel like the lengthening brush can get a little clumpy. It tends to get too much mascara so you do need to wipe or else you get nasty bulk. Yucky. I feel like the volumising side is more of a separation side. 
Other Thoughts: It cleans off easily. It doesn't smudge nor flake and this makes me happy!
Price: 20 whopping dollars. This is unacceptable for my budget. 
Recommended: Yes, if you have the money. If you usually spring for high end mascaras, then you might as well try this out!

Thursday, November 3, 2011

Itching for a new Iron

So, I've actually been itching to buy a new iron. My iron isn't *bad*, but I would like a larger barrel curling iron and a hotter flat iron. Mine currently doesn't really tame frizzy hair. I was looking online and I came across these: 
Karmin G3 Salon Pro
Karmin G3 Salon Pro Professional 100% Pure Tourmaline Ceramic Flat Iron


Karmin Salon Pro Clipless Ceramic Tourmaline Curling Iron
Karmin Salon Pro Clipless Tourmaline Curling Iron


They are pretty expensive at over 100 dollars, but I think that if they ever go on sale, I have to try them out!  I really wanted to try out the clipless version because it's just cool! I think that VS sassoon has a version, but I'm not sure. Also I like how the clipless iron also gives you a glove. I was pretty worried when browsing online that I would have to buy an ove-glove to use it. Super sexayyyy.
Also, I like the pink flat iron. It's so pretty! My croc has tourmaline plates, but it's just getting kinda old so it does need to be replaced. 

This site ships world wide and everything is in Canadian Dollars. If you do get something, make sure to let me know!

Friday, October 21, 2011

Haul over Mid-semester Break

It's been a while since I've posted, but I've been busy. However, today was mid-semester break so I got a chance to haul a bit. 


From Good Will

H&M

H&M

Forever 21

Forever 21

Forever 21
Phew. I had a good bonding experience with my roommate. I have been eyeing this pleather jacket for ages so I'm happy I finally bought it. I also got the sweaters as a BOGOF sale they had. Yay!

Wednesday, October 12, 2011

EOTD: Ocean

Finally, I've broken out of my dumped slump. Me and the ex have started talking again. I think we'll be close again soon and it makes me happy. This is my makeup look for today. 


I also cut my hair myself yesterday. I cut bangs and chopped off three inches off the end of my hair. I love it so much. It's pretty asian, but I haven't rocked the bangs and short hair since I was 8. My hair feels a lot better because the split ends are gone and yeah. Ill take a picture tomorrow. 


Today, I'm also wearing Taj Sunset by Escada

Saturday, October 8, 2011

Broken

Sorry about the lack of posts. My boyfriend broke up with me about a week ago. I will have a new post this week though. See you then

Monday, September 26, 2011

After Party

My birthday was on September 22nd yay. So around a month ago, I was at Target with my friend and I saw this pair of shoes I liked. I didn't get them because I didn't have enough money at the time. SO he went to Target, got them for me for my birthday. He even remembered my size. You are awesome friend. 


Super cute. As for not posting more often, sorry but often life calls you know? I haven't really posted anything makeup-ey lately but I will get on that soon. 

Tuesday, September 20, 2011

Two Days Until my Birthday

Two more days until my birthday!
Ugh there is the worst scratch on the mirror so it looks like I have socks on. I don't. I promise


Top: H&M
Jacket: Gifted
Tights: Clearance rack from Target
Skirt: DIY from shorts
Belt: Mom's Closet
Shoes: Amazon.com

Sunday, September 18, 2011

Review: AirPlus gel Ball of Foot Cushion

A few weeks ago, I wanted to buy some of those half-insoles. I wanted my foot to have a squishy thing to sit on while wearing my Cole Haan shoes. The vamp is pretty steep so it's not like I can wear it all the time or for a very long time. 


I went to Rite Aid and I bought these "AirPlus gel things". I thought they were a pretty good deal at around 4.50 for 2 pairs. That's cheap! This is what they have to say about the product:


"Airplus Gell ball of Foot Cushions are made with proprietary invisigel that provides superior shock absorption, long-lasting comfort and relief of foot pain and discomfort" (Obtained from back of package)


Comfort: None. It feels squishy in your hand but when you put it in a shoe, it's like putting a piece of cement there. It's not comfortable at all. It makes my feet hurt more actually. It doesn't help that it doesn't "stick" to the shoe at all. I put them in my open toed sandals and by 2 hours, they've slipped and like.. rolled into a mess under my foot. They literally were moving because my feet were moving. Also, they got really really sweaty really quickly. Gross. 


I used it on my Cole Haan shoes and they're alright. They're better to make your feet actually fit in the shoe better. I mean that's the only purpose they're good for. I actually no longer use them in my Cole Haans because they make the toe box too tight for me. Sigh. They seem to work for closed toed shoes and not open toed shoes. 


Guarantee: AirPlus has a guarantee that "guarantee that you will be happy with this Airplus product! If unsatisfied for any reason, please return for a complete refund of replacement. 100% Money-Back Guarantee". Well, I also lost my Rite Aid receipt so no way I'm returning it there. I contacted customer services and they told me "Sorry I can't accept returns without a receipt". 


...........


What? So there really isn't a 100% money-back guarantee then? Oh cool thanks. 


Also there's a website on the back of the packaging: airplusfootcare.com. It doesn't work. I had to google airplus to get a website. LAME. 


Recommended: NO. Just buy rite aid brand instead. 

Wednesday, September 14, 2011

OOTD/DIY: Keep it Simple

Ugh. I've been a horrible blogger lately, but I've also been busy. I'm actually rushing a sorority and bids will be announced next week! I'm pretty damn excited. Anyway, this is my outfit. 


BTW: Like me on FB! You can just do so in the sidebar :)


Top: DIY. I had a fruit of the loom plain white tee with v neck. Then I just cut a triangle out of the back and made two slits in the shoulders and tied them in a knot. 


Shorts: DIY with high waisted pants. Just cut to desired length and hem


Belt: Stolen from my mommy's closet :)

Tuesday, September 6, 2011

Black and Grey

It's been a while since I last posted, but that's because I don't have anything to post about. YES I really am that boring :)

Top: Mom's closet (not a name of a store lol)
Jeans: Mom's closet
Boots: Target (20 dollars)

Friday, September 2, 2011

OOTD: 91 degrees and over.

Today is 91 degrees with insane humidity. Literally my makeup is melting off my face. No amount of TFSI is going to save it. So, I stuck with a simple eye and did bright lipstick. I love how lipstick will stay regardless of the humidity. I mean that is as long as you don't lick or whatever. 

I'm also loving this new blogger format. It's fantastic. It's a lot cleaner and I like it a tonne.  


Have a nice labor day! Make sure to like me on facebook :) Just check out the sidebar